How To Make Custom Insoles – 5 Easy Steps
Welcome to our blog post on how to make custom insoles! If you’ve ever struggled with uncomfortable shoes or foot pain, you know just how important it is to have proper foot support.
Custom insoles can be a game changer, providing personalized comfort and stability that off-the-shelf options can’t match.
In this article, we’ll guide you through making custom insoles, allowing you to tailor them to your unique foot shape and needs. Say goodbye to sore feet and hello to ultimate comfort—let’s get started!
Benefits to make Custom Insoles
1. Enhanced Comfort: Custom insoles provide personalized support and cushioning, alleviating discomfort caused by flat arches, high arches, or other foot conditions.
2. Improved Foot Alignment: Misalignment can lead to problems like foot pain, knee pain, and even hip or back problems. Custom insoles can help correct your foot alignment by providing proper arch support and redistributing pressure evenly across your feet. It promotes better posture and reduces strain on joints and muscles.
3. Injury Prevention: Injuries such as plantar fasciitis, shin splints, stress fractures, and Achilles tendonitis can be significantly reduced by providing adequate support and addressing biomechanical imbalances.
4. Enhanced Athletic Performance: Athletes often find that custom insoles improve their performance by enhancing stability, balance, and overall foot function. With optimal support for their specific sports requirements, athletes experience improved power transfer and reduced fatigue.
5. Longevity: Typically, custom-made insoles are more durable than off-the-shelf options due to their higher-quality materials.
6. Compatible with All Shoe Types: Insoles can be custom-made to fit any shoe type, whether you wear sneakers for everyday wear, specialized shoes for sports, or work boots.
Materials and Tools Needed to Make Custom Insoles
Here are the essentials you’ll need to make your custom insoles.
EVA foam sheets, which offer excellent cushioning and can easily molded to fit your feet, are commonly used to provide support and comfort.
When using scissors or a craft knife, make sure they are sharp cut out the insole shape. Precision is key here, so make sure your cutting tool is sharp.
To attach the insole to your shoe, you’ll need adhesive. A strong glue or double-sided tape can work well for this step. Choose an adhesive that securely bonds the insole without damaging your shoes.
In addition to these primary materials, a few other tools may come in handy during the customization process. A marker or pen can be useful for tracing around your foot onto the foam sheet before cutting. Sandpaper or a file can help smooth rough edges on the finished insole.
By gathering these basic materials and tools before starting your custom insole project, you’ll be well-prepared to create comfortable and personalized inserts for your footwear!
Step-by-Step Guide to Make Custom Insoles
Step 1: Gather the Materials
Before making custom insoles, ensure you have the right tools and materials. You will need a foam or cork sheet, an X-acto knife or scissors for cutting the material, sandpaper to smooth rough edges, and adhesive to secure the insole inside your shoes.
Step 2: Trace Your Foot
Place your foot on the foam or cork sheet and trace around it with a pencil or marker. Make sure to trace both feet if they are slightly different sizes.
Step 3: Cut Out the Insole
Using your X-acto knife or scissors, carefully cut along the traced lines to create your custom insole. Take your time and be precise to ensure a perfect fit.
Step 4: Shape and Smooth
Once you have cut out the basic shape of your insole, use sandpaper to shape any areas that may feel uncomfortable when placed inside your shoe. Smooth out any rough edges as well.
Step 5: Test and Adjust
Place your custom insoles inside your shoes and test them out. Walk around to see how they feel and make any necessary adjustments by trimming off excess material until they fit comfortably.
Making custom insoles may take trial and error before achieving optimal comfort. Feel free to experiment with different materials or techniques until you find what works best!
Tips for and tricks to make custom insoles
Tips for and Tricks to Make Custom Insoles
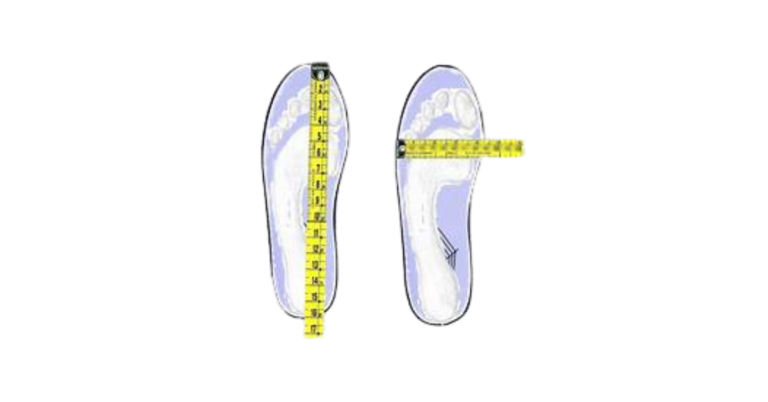
1. Take accurate measurements: You should take precise measurements of your feet before making custom insoles. Identify any areas needing extra cushioning or support and the length and width of each foot.
2. Choose the right materials: When making custom insoles, selecting the appropriate materials is key. Opt for high-quality foam or orthotic materials that offer both comfort and durability. You can find these materials at specialty stores or online suppliers.
3. Use a template: If you’re new to making custom insoles, using a template can be helpful. Templates guide cutting out the shape of your insole, ensuring accuracy and symmetry.
4. Customize with additional features: Consider incorporating additional features into your custom insoles to enhance functionality. It could include arch supports, metatarsal pads, heel cups, or gel inserts for added cushioning and support.
5. Test and adjust as needed: Once you’ve made your initial pair of custom insoles, don’t hesitate to test them and make necessary adjustments. Please pay attention to how they feel during activities such as walking or running and modify accordingly.
6. Replace regularly: Remember that even well-made custom insoles will wear out over time due to regular use and pressure on certain areas of the feet. It’s important to replace them every 6-12 months, depending on usage patterns.
Following these tips and tricks when making custom insoles, you can create personalized foot support tailored to your needs!
Alternative Options for Custom Insoles
Alternative Options for Custom Insoles
While making custom insoles yourself can be a rewarding DIY project, alternative options are available if you prefer to avoid making them from scratch. Here are some alternatives to consider:
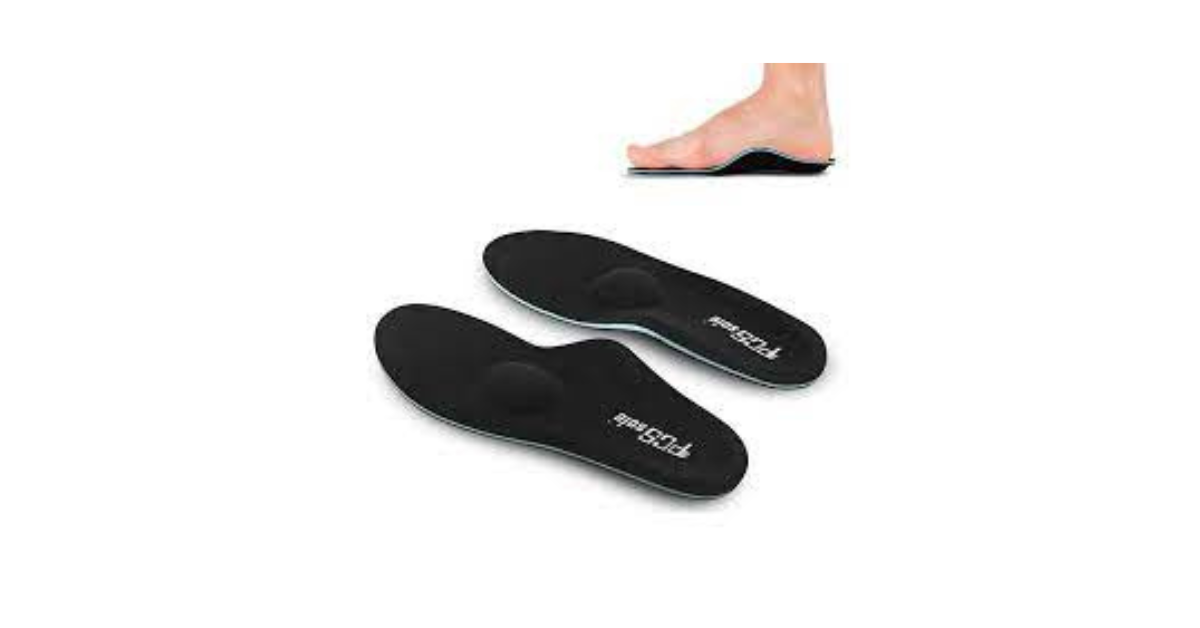
1. Off-the-Shelf Insoles: If you’re looking for a quick and convenient solution, off-the-shelf insoles can provide some customization. These pre-made insoles come in different sizes and styles to accommodate various foot conditions.
2. Heat Moldable Insoles: Heat moldable insoles offer a middle ground between custom-made and off-the-shelf options. This insole can be heated and molded to your foot shape, providing a more personalized fit.
3. Podiatrist-Made Orthotics: If you have specific foot issues or need specialized support, consult a podiatrist.
4. 3D Printed Insoles: With advancing technology, 3D printed insole options are becoming increasingly popular. These digitally designed and printed inserts offer precise customization based on individual foot measurements.
5. Footwear Modifications: Another alternative is modifying your existing shoes or purchasing shoes with built-in customizable features such as adjustable arch supports or removable inserts.
Although these alternatives may offer some degree of customization, they may offer a different level of precision than handmade custom insoles made specifically for your feet.
Conclusion
Custom insoles can be a rewarding and cost-effective solution for those seeking personalized comfort and support. The above step-by-step guide lets you create insoles that perfectly fit your feet and address any specific foot issues or discomfort.
The benefits of making custom insoles are numerous. They provide enhanced comfort, stability, and weight distribution, alleviating pain and preventing future foot problems. Additionally, they allow you to customize the material used for cushioning and adjust the level of arch support to suit your needs.
To make custom insoles, materials such as foam or gel padding, scissors or a utility knife, adhesive glue or tape, measurement tools like paper or cardboard templates, and sandpaper for finishing touches.
Remember that every individual’s feet are unique, and what works for one person may not work for another.
Can I make custom insoles at home?
Yes, you can make custom insoles at home. With the right materials and patience, you can create personalized insoles that cater to your specific foot needs.
How do I measure my feet for custom insoles?
Start by placing your foot on a piece of foam or cork material and trace around it using a marker or pen. Next, use measuring tape to accurately measure the length and width of your foot outline.
Can I customize my homemade insole further?
Absolutely! Once you have mastered making basic custom insoles, you can experiment with different thicknesses and densities of materials to provide additional support where needed.